
Works to IICRC S520
Every project follows the IICRC S520 reference for professional mold remediation.
Florida Mold-Services Framework IICRC S520 Reference
(305) 655-3290 Hablamos Español
Hialeah · Bathroom Remediation
Tile, grout, ceiling, and behind-wall bathroom mold work for Hialeah homes — surface treatment where appropriate, full tile removal and moisture-resistant substrate replacement where required, and exhaust fan upgrades that prevent recurrence.
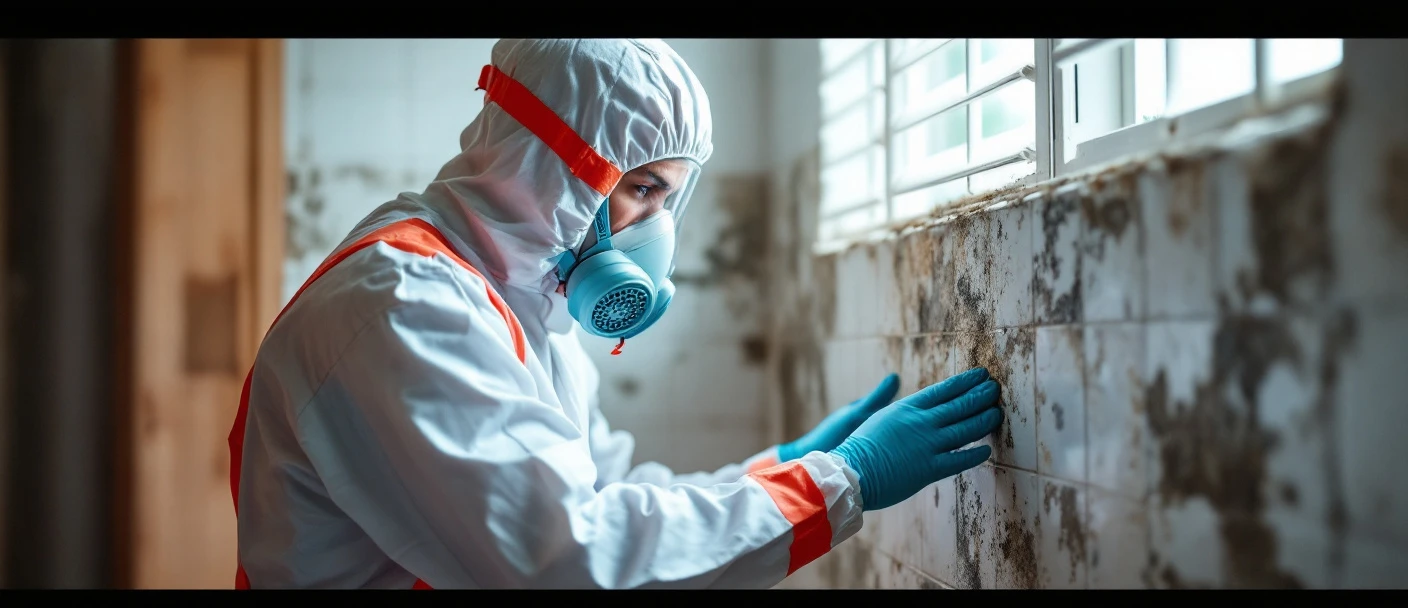
Bathroom mold in Hialeah occupies two entirely different zones — the visible surface (tile face, grout joints, ceiling paint) and the hidden substrate (drywall behind the tile, framing inside the shower wall). Surface cleaning addresses only the first zone. The behind-wall zone is reached only by removing the tile and substrate, treating the framing, and rebuilding with cement board or DensShield tile backer that cannot support behind-wall mold colonization. Every bathroom mold project we complete in Hialeah starts with a moisture assessment that determines exactly which zone is affected — because the scope, cost, and timeline are different, and treating surface mold while leaving behind-wall contamination sealed under new tile produces a failure the next time the caulk fails at the tub deck.
How it works
Bathroom mold remediation follows five phases — from a moisture assessment that distinguishes surface-treatable conditions from behind-wall substrate contamination, through source correction, scope-appropriate demolition and treatment, moisture-resistant rebuild, and post-work verification. The assessment drives every subsequent decision in the project.
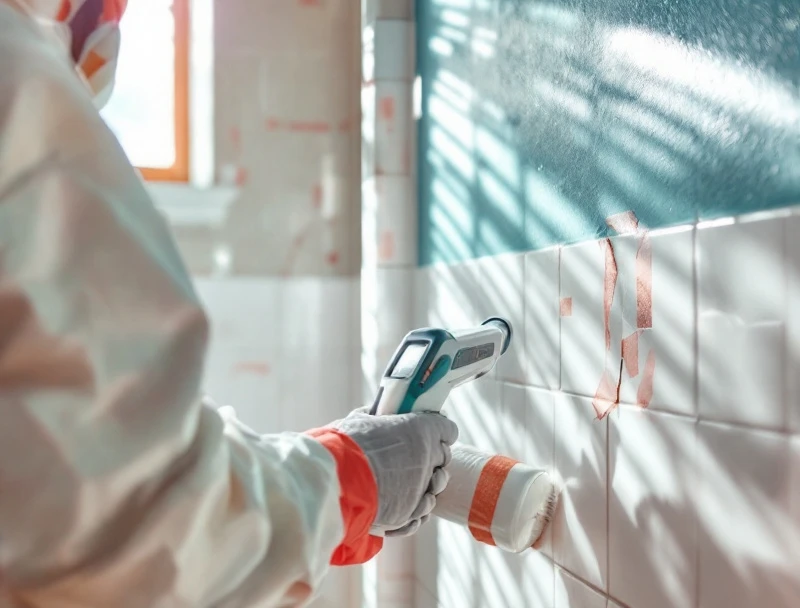
The bathroom assessment begins with moisture mapping using both a non-invasive capacitance meter and a pin meter on grout joints, tile, drywall at the tile perimeter, and ceiling surfaces. A tap test on every tile in the shower and tub surround identifies hollow-sounding tiles — the acoustic signature of adhesive failure caused by behind-wall moisture intrusion. Hollow tiles are a reliable indicator of substrate saturation and require investigation of what is behind them before any treatment scope is finalized. The exhaust fan is tested with a flow meter to confirm whether it delivers adequate CFM for the bathroom volume and is verified to discharge to the exterior rather than into the ceiling plenum or attic space. The assessment produces a written scope distinguishing surface-treatable areas from areas requiring tile removal and substrate replacement.
Bathroom mold remediation without correcting the moisture source produces recurrence — typically within one to three months. Source correction is completed before or simultaneously with remediation work. Failed grout joints at the tub or shower floor transition, missing or deteriorated caulk at tile-to-fixture joints, and cracked tiles that allow water migration behind the wall assembly are repaired or replaced. Exhaust fans that are undersized, non-functional, or improperly terminated are upgraded before new tile or drywall is installed. A bathroom that is rebuilt with new materials over an active leak will fail again — the written scope explicitly identifies every moisture pathway and requires confirmation that each is closed before the project is signed off.
The scope decision — surface treatment versus tile removal and substrate replacement — is made based on the moisture assessment findings. Tile that is firmly bonded, sheathing behind the tile that reads below 15% MC, and no visible growth behind accessible grout joints can be addressed with grout and caulk removal, antimicrobial surface treatment, and re-grouting or re-caulking. Tile that tests hollow, sheathing that reads above 15% MC, or any visible mold growth on the wall surface behind a removed tile triggers a substrate removal and replacement scope. Proceeding with surface treatment on hollow or wet tile is a documented failure mode — the moisture and mold behind the substrate continues to develop after the surface is sealed.
When tile removal is required, tiles are removed with an oscillating multi-tool to minimize substrate damage and dust generation. HEPA vacuuming is performed before, during, and after any material removal. Mold-affected drywall behind the tile assembly is removed back to the nearest stud, bagged, and disposed of as mold-contaminated material. Exposed framing is HEPA-vacuumed, inspected for structural integrity, and treated with an EPA-registered antimicrobial. New substrate is installed using cement board or DensShield tile backer — never standard drywall — in the shower and tub surround wet zone. DensShield and cement board do not contain the paper facing that Penicillium, Aspergillus, and Stachybotrys require to colonize.
After substrate installation and framing drying verification (moisture content below 19% MC for framing, below 15% MC for new substrate), the exhaust fan upgrade is completed if not performed in Step 2. New fan sizing is based on the bathroom volume: ASHRAE 62.2 recommends 50 CFM for intermittent operation in bathrooms under 100 square feet, with proportional sizing for larger spaces. The new tile is installed over the moisture-resistant substrate with appropriate waterproof tile membrane at the shower pan transition. Grout joints and tile-to-fixture caulk lines receive mold-resistant formulations. Post-work moisture verification confirms that the new assembly meets moisture content thresholds before the bathroom is returned to use.
Remediation scope
Bathroom mold work ranges from targeted grout and caulk treatment at one end to a full gut-and-rebuild at the other. The eight scope components below represent the range of work that may be required — the written assessment determines which components apply to a specific bathroom based on moisture findings and the extent of contamination.
When tile tap testing confirms hollow adhesion or moisture meter readings indicate wet substrate, shower and tub surround tile is removed systematically with an oscillating multi-tool. HEPA vacuuming contains disturbed spores during demolition. Mold-affected drywall behind the tile is removed to the nearest stud, framing is treated with EPA-registered antimicrobial, and replacement substrate is cement board or DensShield tile backer — not moisture-resistant drywall, which still contains paper facing that can support mold under sustained moisture. The waterproofing membrane at the shower pan-to-wall transition is inspected and replaced if degraded.
The tile industry standard for wet-area wall substrate is cement board (Hardiebacker, Durock) or glass-mat gypsum tile backer (DensShield). Neither product contains the paper or organic facing material that mold species require to colonize — they can support mold growth only on surface contamination, not through the substrate matrix. All shower and tub surround rebuilds in our Hialeah bathroom scope use cement board or DensShield as the wall substrate, with fiberglass mesh tape and thinset at all joints. Standard moisture-resistant drywall (greenboard) is not used in tile wet zones — it is appropriate only for non-wet-zone bathroom walls and ceiling applications.
Bathroom exhaust fans that are undersized, inoperative, or discharging into the ceiling plenum or attic space are upgraded as part of every bathroom mold remediation scope. ASHRAE 62.2 recommends a minimum of 50 CFM continuous or 100 CFM intermittent for bathrooms under 100 square feet. Fan sizing is confirmed with a flow meter after installation. The discharge duct — typically 4-inch flex duct — is terminated through the roof deck or soffit to the exterior with an exterior grille, not into the attic or ceiling cavity. An exhaust fan that is not running or discharging correctly is the most common single reason Hialeah bathroom mold recurs after remediation.
After surface treatment or new tile installation, grout joints in wet areas are sealed with a penetrating silane or siloxane sealer to reduce water absorption. Tile-to-fixture caulk joints (where tile meets the tub deck, shower floor, faucet escutcheons, and vanity countertop) are replaced with 100% silicone mold-resistant caulk — not sanded grout, which has no flexibility at these movement joints and cracks within months of use. The caulk joint at the tub deck-to-tile transition is the highest-failure-rate location in a Hialeah bathroom and the most frequent origination point for behind-wall moisture infiltration in tile surround assemblies.
Following all remediation and rebuild work, a post-work moisture survey confirms that new substrate and adjacent framing are within acceptable moisture content ranges before the bathroom is returned to use. For projects where behind-wall mold growth was confirmed, a surface tape-lift sample from the treated framing surfaces can provide laboratory confirmation that no viable mold colonies remain on the structural members before new substrate covers them. For projects with insurance or real estate documentation requirements, a post-remediation air sample collected in the bathroom provides the chain-of-custody documentation needed for claim filing or disclosure.
When bathroom surface sampling or the visual condition behind removed tile confirms Stachybotrys chartarum — which colonizes paper-faced drywall behind shower walls after sustained water infiltration — the scope escalates to a toxic-mold removal protocol with IICRC S520 Level III full containment before any tile or drywall is removed. When HVAC supply registers in the bathroom show elevated spore counts or the air handler serving the bathroom has been identified as a distribution source, the project expands to include ductwork remediation under NADCA ACR 2021 alongside the tile and substrate work.
Hialeah cost reference
Bathroom mold costs range from under $500 for surface grout and caulk treatment to $10,000 or more for a full master bath gut-and-rebuild with DensShield throughout. The twelve scenarios below reflect current Hialeah market ranges. The pre-remediation assessment, active remediation, and post-work verification are each separate professional services — all three are included in a complete project cost.
Surface grout and caulk treatment, antimicrobial, re-caulk (no tile removal)
Bathroom ceiling mold removal and recoat — paint-surface mold, no drywall demo
Ceiling mold with drywall removal, moisture-resistant replacement, prime and paint
Exhaust fan upgrade — supply, install, and exterior-termination duct rerouting
Partial shower wall tile removal, behind-wall treatment, cement board, re-tile (1 wall)
Full shower surround tile removal, substrate replacement, new tile — 3-wall surround
Tub surround tile removal, cement board, new tile — 3-wall
Grout removal and mold-resistant re-grouting — shower surround only
Post-remediation surface tape-lift sampling + accredited lab
Full bathroom gut — shower, tub, ceiling, floor — DensShield + new tile throughout
Full bathroom with window or vanity moisture damage added to tile scope
Master bath full gut rebuild with moisture-resistant substrate and exhaust fan upgrade
Full shower surround tile removal + new tile
Most common Hialeah bathroom mold scope
Exhaust fan upgrade installed
Single most cost-effective mold prevention upgrade
Surface grout & caulk treatment
Appropriate only when substrate is dry and tile is bonded
Coverage map
We serve all seven Hialeah ZIP codes and adjacent Miami-Dade communities for bathroom mold assessment, remediation, and rebuild work. Call directly at (305) 655-3290 to discuss scope and availability for your address.
Why us
Every project follows the IICRC S520 reference for professional mold remediation.
Aligned with Florida's Chapter 468 Part XVI mold-services framework, including the assessor-remediator separation rule.
HVAC work follows the NADCA ACR 2021 protocol — coil, drain pan, plenum, ductwork, and air handler in scope.
Post-remediation verification is arranged through a separate Florida-licensed mold assessor.
Post-storm and water-damage workflows refined across South Florida hurricane seasons.
Scope-based estimates with cost ranges before any demolition begins.
Moisture log, photographs, and source identification prepared in adjuster-ready format.
Post-remediation verification arranged through a separate Florida-licensed assessor.
Same- or next-day on-site response across Hialeah ZIP zones and inner Miami-Dade.
Written scope of work that maps to IICRC S520 Condition language before any demolition.
Scope determination
The most consequential decision in any bathroom mold project is whether the contamination is limited to the tile surface and grout joints — where it can be addressed with targeted cleaning and re-caulking — or whether it has penetrated behind the tile assembly into the substrate. This determination cannot be made from a visual inspection of the tile face alone. It requires the combination of a tap test, moisture meter readings, and the assessment of any available edge or perimeter conditions where the wall assembly can be probed.
The tap test is the most reliable non-destructive indicator. A firmly bonded tile produces a sharp, solid sound when tapped with a knuckle or a hard object. A tile that has lost adhesive contact with its substrate — because the substrate swelled, delaminated, or failed — produces a dull, resonant sound. This hollow sound is the acoustic result of the air gap between the tile back and the failed substrate surface, and it is present even when the tile face and grout lines appear visually intact. Hollow tile is found at every confirmed behind-wall mold project we have completed in Hialeah bathrooms — it precedes visible surface symptoms in most cases.
Moisture meter readings at accessible tile perimeter areas (where the grout meets the tub deck, the floor, or the vanity) and through drilled-out grout joints provide quantitative data. Drywall substrate above 15% MC indicates current or recent sustained moisture contact. Readings above 19% MC indicate active moisture with the source still present. When the substrate reads dry at the perimeter but hollow tiles are present in the interior of the surround, the moisture infiltration pathway is typically a failed grout joint in a non-perimeter location — hidden from visual inspection but detectable by tap testing.
When behind-wall mold is confirmed after tile removal, species identification by surface tape-lift or swab sample is the next step — particularly if the growth appears dark-colored and gelatinous or if the moisture event was prolonged. For health-complaint investigations or legal documentation, mycotoxin lab panels may be ordered alongside the structural remediation scope when a physician or attorney has requested metabolite documentation from the bathroom environment.
Why it recurs
The most frequent cause of bathroom mold recurrence after professional remediation is a scope that addressed the visible contamination without correcting the three conditions that produced it: a moisture pathway behind the tile, an inadequate exhaust fan, and a substrate that can support mold colonization. Understanding which scope is appropriate for a given bathroom requires the moisture assessment findings — not an estimate based on photographs or a surface-only visual inspection.
| Factor | Surface Treatment | Partial Demo + Rebuild | Full Gut Rebuild |
|---|---|---|---|
| Applicable when | Tile bonded, substrate dry, no growth behind wall | Hollow tile or wet substrate — growth behind wall likely | Extensive hollow tile, substrate failed, visible behind-wall growth |
| Method | Grout removal, antimicrobial, re-grout, re-caulk | Remove hollow tile, treat framing, replace substrate, re-tile | Full tile removal, framing treatment, DensShield, re-tile |
| Mold behind wall | Assumed absent — surface scope only | Confirmed or likely — removal and treatment required | Confirmed — full removal, HEPA, and framing treatment |
| New substrate | Not required | Cement board or DensShield for replaced sections | DensShield or cement board throughout wet zone |
| Exhaust fan | Upgrade recommended | Upgrade during demolition phase | Upgrade required as part of scope |
| Recurrence risk | High if exhaust fan is inadequate or caulk re-fails | Lower with proper substrate and fan upgrade | Lowest — proper substrate, sealed waterproofing, fan upgrade |
| Typical range | $200–$800 | $800–$3,000 | $2,500–$8,000+ |
The partial demo and substrate replacement scope is the correct scope for the majority of Hialeah bathroom mold projects involving hollow tile and wet substrate — it removes the contaminated material, replaces it with a substrate that cannot support behind-wall mold colonization, and corrects the exhaust fan simultaneously. It costs more than surface treatment and less than a full gut rebuild, and it is the only scope that actually addresses the behind-wall contamination without requiring complete bathroom demolition.
Bathroom ceiling mold is the most reliable indicator of exhaust fan inadequacy. A functioning exhaust fan that delivers the correct CFM for the bathroom volume and discharges correctly to the exterior prevents the sustained high-humidity condition that produces ceiling mold growth. Ceiling mold that recurs after treatment — without a leak source from above — is almost always a ventilation failure. When ceiling mold and behind-wall shower mold coexist in the same bathroom, both the fan upgrade and the tile scope are required; addressing only one produces partial improvement and continued recurrence in the untreated zone.
In Hialeah homes built before 1985, bathroom ceiling mold frequently originates from the attic above rather than from shower steam alone — bath fans improperly terminated into the attic space deliver concentrated humid air to the ceiling plenum, where it condenses against the underside of the roof deck and drips back onto the bathroom ceiling drywall. When the bathroom ceiling mold is directly below an attic fan termination problem, correcting the ceiling scope without also correcting the attic involves the attic sheathing remediation scope to address the fan discharge and sheathing damage in the same project.
Hialeah local context
Hialeah's residential bathroom stock spans six decades of construction — from 1950s ceramic tile over concrete block to 1990s fiberglass tub enclosures with drywall surrounds — and each era has characteristic mold failure modes that follow predictably from the materials and methods used at the time.
The 1975-to-1990 construction era introduced paper-faced drywall as the shower surround substrate in Hialeah homes — replacing mortar-bed systems for their faster installation and lower labor cost. This transition created the most mold-vulnerable bathroom assembly in Hialeah's housing stock. Paper-faced drywall behind a tile shower surround fails predictably: grout joints crack from thermal cycling and building movement, water infiltrates the paper face, and Penicillium and Aspergillus colonize the paper backing within weeks of the first significant moisture event. By the 1980s, moisture-resistant drywall (greenboard) partially addressed this, but greenboard still contains paper facing and fails the same way as standard drywall under sustained moisture — simply over a longer timeline.
Post-1990 construction introduced fiberglass tub enclosures as a lower-cost alternative to tile surrounds. These enclosures eliminate the tile-grout-caulk failure mode on the tub surround walls themselves, but the ceiling above, the wall adjacent to the enclosure, and the drywall returns at the opening all remain vulnerable to moisture-driven mold. Fiberglass enclosure failures in Hialeah typically originate at the caulk joint where the flange meets the drywall return — a joint that fails within 5 to 10 years in Florida's thermal cycling environment, admitting water behind the return wall assembly.
When a Hialeah bathroom mold project is part of a broader whole-home moisture event — a roof leak that affected multiple rooms, a plumbing failure that spread water through wall cavities, or a post-storm flooding event — the bathroom scope is coordinated with the overall mold remediation project rather than treated as an isolated single-room scope. Whole-home events require a single assessment report covering all affected areas, a single remediation protocol coordinating the bathroom, wall cavity, and ceiling scopes, and a single clearance test covering all remediated areas — because a multi-area project documented with separate assessments and separate clearances creates gaps that insurers and attorneys identify during claim review.
Get started
Tell us what you have — visible tile or ceiling mold, a musty odor after surface cleaning, hollow-sounding tiles, or a specific moisture event that affected the bathroom. Include the approximate bathroom size, whether the mold is in the shower, ceiling, or both, and your ZIP code. Call directly at (305) 655-3290 for priority scheduling.
60-second form. We call you back.
We respond during business hours, usually within an hour.
Frequently asked questions
Surface cleaning with bleach or antimicrobial spray treats only the visible surface — it does not reach mold growing within grout joints, behind tile, or inside the drywall substrate behind the shower wall assembly. The three most common reasons bathroom mold recurs after cleaning are: mold growing in grout pores or behind the tile that was not reached by surface treatment; a failed caulk joint at the tub deck or shower floor transition that continues to admit water behind the tile; and an inadequate exhaust fan that maintains above-70% relative humidity during and after every shower. Cleaning removes visible surface growth and temporarily reduces spore counts, but the colony re-establishes from the subsurface network that cleaning did not address.
Ceiling mold and shower wall mold typically have different causes and therefore different scopes — though both can coexist in the same bathroom. Shower wall and tub surround mold originates from water infiltration behind tile through failed grout or caulk joints — the moisture source is the shower itself. Ceiling mold originates from humid air accumulation — condensation of shower steam on a cooler ceiling surface — and is driven primarily by exhaust fan inadequacy rather than a plumbing or tile failure. Ceiling mold in a bathroom with an adequate, functioning exhaust fan is less common than ceiling mold in a bathroom with a failed, undersized, or incorrectly terminated fan. The two scopes require different corrections and are addressed separately in the written assessment.
Four indicators suggest mold behind shower tile: tiles that sound hollow when tapped, elevated moisture meter readings at grout joints or tile edges, a persistent musty odor after surface cleaning, and mold or water staining on the exterior face of the shower wall in an adjacent room. Hollow tile — the most reliable indicator — occurs when the adhesive mortar between the tile and the substrate has failed, typically because the substrate swelled and delaminated from sustained moisture contact. A hollow tile that is removed typically reveals visible mold growth on the back face of the tile and on the exposed substrate surface. Surface cleaning of the tile face cannot reach this contamination — tile removal and substrate replacement is the only effective treatment when behind-wall growth is confirmed.
Surface mold on tile, grout, and painted ceiling surfaces — where growth is limited to the top layer and the substrate tests dry — can be addressed by a homeowner using EPA-registered bathroom antimicrobials, grout removal tools, and mold-resistant re-caulking. Mold that has penetrated behind tile or into drywall substrate requires professional remediation: tile removal generates disturbed spore loads that require HEPA containment during demolition, behind-wall framing may require structural evaluation if moisture damage is extensive, and the new substrate installation requires proper waterproofing detail at the shower pan transition. DIY treatment of behind-wall mold that does not include full substrate removal typically results in sealed-over active growth that resumes within weeks.
Cement board (Hardiebacker, Durock) or glass-mat gypsum tile backer (DensShield) are the appropriate substrates for tile wet zones — not moisture-resistant drywall (greenboard) and not standard drywall. Cement board and DensShield do not contain paper or organic facing material that mold can colonize from within the substrate matrix. Moisture-resistant drywall still contains paper facing and a gypsum core that can support mold growth under sustained moisture exposure — it is not appropriate for shower or tub surround wet zones, despite its widespread use in lower-cost construction. The TCNA (Tile Council of North America) Handbook specifies cement board or glass-mat tile backer as the required substrate for shower and tub surround tile installations in wet environments.
Florida Statute Chapter 468 requires the mold assessment and mold remediation to be performed by separately licensed professionals when the work involves a licensed mold remediator — the same contractor cannot both assess and remediate. For small surface-only bathroom mold work (grout cleaning and re-caulk without any structural demolition), this separation may not apply depending on project scope and contractor licensing. For any bathroom scope involving drywall removal, substrate replacement, or confirmed behind-wall mold growth, the Chapter 468 framework requires a written assessment by a licensed assessor before remediation begins and a post-remediation verification by an independent licensed assessor. Confirming which licensing requirements apply to a specific scope is part of the initial assessment.
A surface-treatment-only scope — grout removal, antimicrobial treatment, and re-caulk — is typically completed in 1 day. A partial tile removal scope (1 wall of shower surround, substrate replacement, new tile) takes 3 to 5 days including tile setting and grout cure time. A full shower gut and rebuild takes 5 to 10 days depending on tile complexity and material availability. The mandatory pre-remediation assessment adds 3 to 7 days to the total project timeline. Exhaust fan upgrades can typically be completed in a half day. The bathroom is not returned to use until the tile grout has cured (minimum 24 to 72 hours depending on grout type) and the post-work moisture verification is passed.
Yes — an undersized, non-functional, or incorrectly terminated exhaust fan is the single most common cause of recurring bathroom ceiling mold and elevated relative humidity that accelerates grout degradation and caulk failure in Hialeah bathrooms. A bathroom with a functional, properly sized exhaust fan running during and for 20 minutes after every shower maintains relative humidity below 60% within 30 to 60 minutes of shower end — conditions under which mold cannot sustain colony growth. The same bathroom with a failed or absent fan sustains above-70% relative humidity for hours after shower use — the environment in which Penicillium, Aspergillus, and eventually Stachybotrys establish colonies on every porous surface in the room. Fan replacement costs $400 to $800 installed and is the most cost-effective mold prevention measure available in a Hialeah bathroom.
Yes — Stachybotrys chartarum colonizes paper-faced drywall behind shower tile when sustained water infiltration through failed grout or caulk joints maintains the substrate in a wet state for 48 to 72 hours or more. The drywall behind a leaking shower surround can remain wet continuously for months if the tile face appears intact and the leak is not detected. Stachybotrys confirmed behind bathroom tile elevates the remediation scope to IICRC S520 Level III containment — the full-face respirator, poly barrier, and HEPA scrubber protocol — rather than a standard tile-replacement scope. When surface tape-lift or air sampling indicates possible Stachybotrys in a bathroom context, species confirmation sampling before demolition determines whether Level III protocol is required before tile removal begins.
Behind-wall bathroom mold removal involves removing the tile assembly, HEPA-vacuuming disturbed material during demolition, removing the mold-affected drywall substrate back to the nearest stud, treating the exposed framing with EPA-registered antimicrobial, and installing new cement board or DensShield tile backer before re-tiling. The entire sequence is performed with HEPA vacuum containment to prevent the spread of disturbed spores to the rest of the bathroom and adjacent rooms. If Stachybotrys is confirmed, full Level III poly containment is required before any tile or drywall is removed. After framing treatment and new substrate installation, a post-work moisture verification confirms that all structural members are within acceptable moisture content ranges before the new tile is bonded over the substrate.
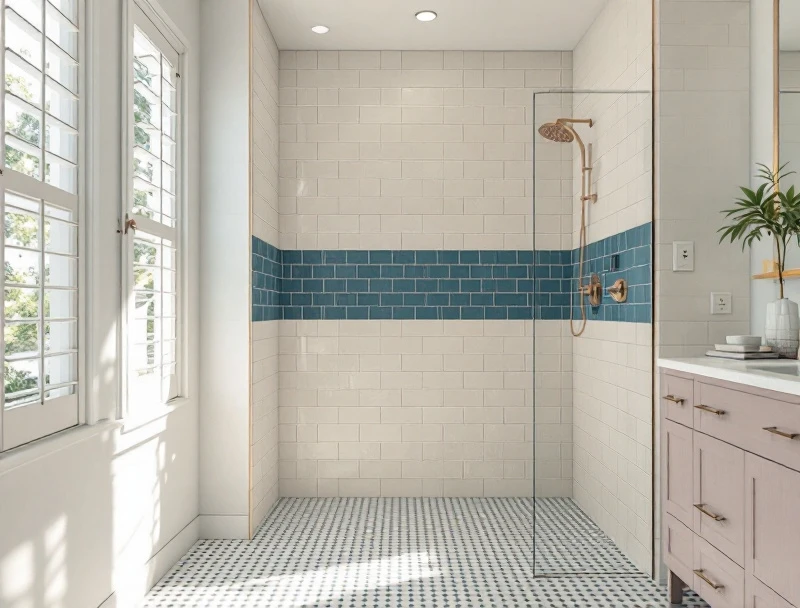
Tile, grout, ceiling, and behind-wall mold work — moisture-resistant substrate, correct exhaust fan, and documented clearance. Call (305) 655-3290.